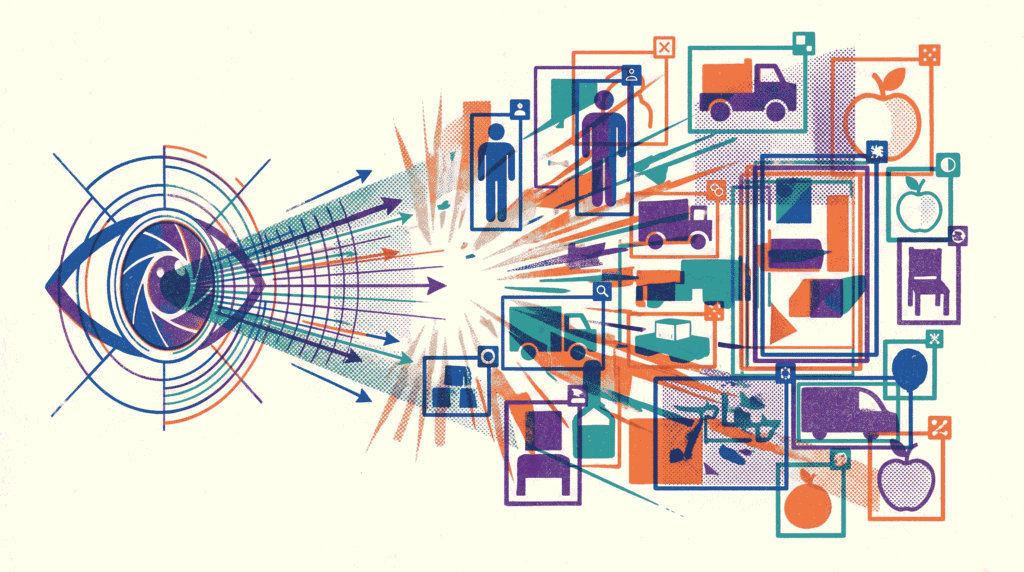
YOLOv11 object detection is one of the most practical ways to teach a computer how to find objects in an image or video. In simple terms, the model looks at a scene, identifies what is present, and draws boxes around the objects it recognizes. Because the system is designed for speed and accuracy, YOLOv11 object detection is a strong choice when you need real-time results. Ultralytics describes YOLO11 as a 2024 release with an improved backbone and neck, faster training pipelines, and support for detection, segmentation, classification, pose, and oriented bounding boxes. Object detection itself means finding both the location and class of objects with bounding boxes, labels, and confidence scores. :contentReference[oaicite:1]{index=1}
What you will learn
- What YOLOv11 object detection means.
- How the pipeline works step by step.
- How to train, evaluate, and deploy it.
Why it matters
- It powers smart cameras and automation.
- It helps with fast visual decision-making.
- It works well for real-time computer vision.
Related reading
What Is YOLOv11 Object Detection?
YOLOv11 object detection is a computer vision task where a model identifies objects and draws bounding boxes around them. In plain language, the model answers two questions at the same time: “What is this?” and “Where is it?” That makes object detection different from image classification, which only says what the image contains overall.
The “YOLO” family is known for real-time speed, and YOLO11 continues that tradition with a design that balances accuracy and efficiency. Ultralytics says YOLO11 improves feature extraction through a stronger backbone and neck, and it is built for a wide range of computer vision tasks. Therefore, it is a solid option when you want a practical detector rather than a slow research-only model. :contentReference[oaicite:2]{index=2}
- Input: an image or a video frame.
- Output: bounding boxes, class names, and confidence scores.
- Goal: detect objects quickly and accurately.
- Use case: real-time visual understanding.
If you are building broader vision systems, our article on Multimodal Learning fits nicely here. Computer vision often becomes part of a larger pipeline, and YOLOv11 object detection is a common building block inside that stack.
Why YOLOv11 Object Detection Matters
Many AI models are accurate, but accuracy alone is not enough. In real systems, you also care about latency, deployment cost, and reliability. That is why YOLOv11 object detection matters so much. It gives you a strong balance between speed and quality, which is useful in live applications.
Moreover, Ultralytics says YOLO11 can be used across edge devices, cloud platforms, and systems with NVIDIA GPUs. This flexibility makes it useful for phones, security cameras, factory sensors, retail analytics, drones, and server-based applications. :contentReference[oaicite:3]{index=3}
| Benefit | Why it helps | Real-world example |
|---|---|---|
| Speed | Supports near real-time inference | Live CCTV monitoring |
| Accuracy | Finds objects reliably in many scenes | Vehicle detection in traffic footage |
| Flexibility | Runs on different hardware targets | Edge devices and cloud servers |
| Scalability | Can be deployed in many workflows | Retail analytics and quality inspection |
How Object Detection Works
Before going deeper into YOLOv11 object detection, it helps to understand the basic computer vision pipeline. The model does not “see” like a person does. Instead, it turns pixels into numbers, processes those numbers through a neural network, and then converts the network output into boxes and labels.
First, the image is resized and normalized. Then, the backbone extracts visual features such as edges, textures, and object parts. After that, the neck combines features from different scales. Finally, the detection head predicts boxes, classes, and confidence scores. This flow is the heart of YOLOv11 object detection.
- Backbone: learns visual patterns from the image.
- Neck: mixes features from different resolutions.
- Head: converts features into object predictions.
- Post-processing: turns raw outputs into visible results.
Ultralytics notes that YOLO11 uses an improved backbone and neck, which helps the model extract features more effectively. As a result, the network can better recognize objects in crowded, noisy, or complex scenes. :contentReference[oaicite:4]{index=4}
YOLOv11 Object Detection Model Variants
Ultralytics provides multiple YOLO11 detection checkpoints, including yolo11n.pt, yolo11s.pt, yolo11m.pt, yolo11l.pt, and yolo11x.pt. That range matters because different projects need different trade-offs between speed and capacity. :contentReference[oaicite:5]{index=5}
| Checkpoint | Typical role | Best when… |
|---|---|---|
| yolo11n.pt | Smallest and fastest starting point | Latency is critical |
| yolo11s.pt | Lightweight balanced option | You need speed with a little more capacity |
| yolo11m.pt | Mid-size general-purpose checkpoint | You want a balanced production model |
| yolo11l.pt | Larger, more capable model | You can afford more compute |
| yolo11x.pt | Largest standard checkpoint | You want a heavier model for offline work |
The simplest way to choose is to start small, test the results, and then move upward only if needed. That approach saves time and compute. It also helps you understand whether the performance gain is worth the extra cost.
Dataset Format for YOLOv11 Object Detection
Training YOLOv11 object detection depends heavily on the dataset. Ultralytics’ dataset guide says labels should be stored in one *.txt file per image, with one row per object in class x_center y_center width height format. The coordinates must be normalized between 0 and 1. If your boxes are in pixels, they need to be converted before training. :contentReference[oaicite:6]{index=6}
In practice, this means each object gets its own line. The class number starts at 0. Because of that simple layout, YOLO format is easy to generate, easy to store, and easy to convert from other label systems.
0 0.525 0.376 0.284 0.418
1 0.735 0.298 0.193 0.337
- class: object category ID.
- x_center / y_center: box center coordinates.
- width / height: box size.
- Normalized format: values are scaled to the image size.
The documentation also says that Ultralytics supports dataset conversion from COCO format to YOLO format. That is useful when your annotations already exist in another standard. :contentReference[oaicite:7]{index=7}
The COCO Dataset and Why It Matters
The COCO dataset is one of the most important benchmarks in computer vision. Ultralytics’ COCO documentation says it contains 330K images, with 200K annotated for detection, segmentation, and captioning tasks. It also includes 80 object categories and is widely used for evaluation with mAP. :contentReference[oaicite:8]{index=8}
That is why COCO often appears in YOLO tutorials. It is large, diverse, and standardized. Therefore, it is a good test bed for training and comparing models. Ultralytics also notes that the COCO split includes 118K train images, 5K validation images, and 20K test images. :contentReference[oaicite:9]{index=9}
- Train set: used to learn patterns.
- Validation set: used to tune and compare.
- Test set: used for final benchmarking.
- mAP: the common score for detection quality. :contentReference[oaicite:10]{index=10}
Because COCO is a standard benchmark, it is helpful when you want to judge whether your YOLOv11 object detection model is truly improving or just memorizing your custom data.
How to Train YOLOv11 Object Detection
Ultralytics documents a simple training pattern for YOLO11. You can load yolo11n.pt and train it on the COCO8 example dataset for 100 epochs with an image size of 640. The same workflow is available through both Python and the CLI. :contentReference[oaicite:11]{index=11}
from ultralytics import YOLO

model = YOLO("yolo11n.pt")
results = model.train(data="coco8.yaml", epochs=100, imgsz=640)
yolo train model=yolo11n.pt data=coco8.yaml epochs=100 imgsz=640
In real projects, you would usually replace coco8.yaml with your own dataset configuration. The important part is that the dataset structure is correct, the labels are normalized, and the classes are defined clearly. Once those pieces are ready, the training process becomes much easier to manage.
- Prepare images and labels in YOLO format.
- Choose a checkpoint that matches your compute budget.
- Start with a pretrained model, then fine-tune.
- Monitor validation metrics while training.
The official docs also show that you can load a pretrained YOLO11 model in Python and run inference directly on an image. That makes experimentation simple, especially when you want to verify whether the model is detecting the right classes before you invest in a full training run. :contentReference[oaicite:12]{index=12}
How to Read the Results
A prediction from YOLOv11 object detection usually includes a class label, a confidence score, and a bounding box. The confidence score tells you how sure the model is. The bounding box tells you where the object is. The class label tells you what it thinks the object is.
This is easy to display on an image or video frame. However, reading the output correctly still matters. A high confidence score does not guarantee correctness, and a low confidence score does not always mean the prediction is wrong. Context helps.
| Output element | What it means | Why it matters |
|---|---|---|
| Class label | The category name | Tells you what was detected |
| Confidence | How sure the model feels | Helps filter weak predictions |
| Bounding box | The object’s position and size | Shows where the object is |
When you are debugging a model, this output is extremely useful. It helps you see whether the detector is missing objects, confusing classes, or placing boxes in the wrong place. That is one reason YOLOv11 object detection is so practical in real-world workflows.
Validation, Metrics, and Model Quality
Good models are not judged only by how they look on one example image. They need validation. In object detection, common metrics include precision, recall, and mean Average Precision, or mAP. COCO’s official documentation notes that mAP is the standard benchmark for object detection comparison. :contentReference[oaicite:13]{index=13}
In simple words, precision asks how many predicted boxes were correct. Recall asks how many real objects the model found. mAP combines the two into a broader score across classes and thresholds. Because of that, it is useful when you want a single number to compare models.
- Precision: how accurate the predictions are.
- Recall: how many true objects were found.
- mAP: how good the detector is overall.
- Validation set: the place to measure progress during training.
If the validation score improves but real-world performance gets worse, the model may be overfitting. Therefore, always test on images that resemble the deployment environment. That habit keeps YOLOv11 object detection grounded in reality.
Deployment and Export Options
After training, you often want to deploy the model in a different format. Ultralytics says YOLO11 can be exported to formats such as ONNX and CoreML, and the docs also mention support for other deployment targets. That is useful because different devices and runtimes need different model formats. :contentReference[oaicite:14]{index=14}
In practice, this means you can train in Python, then export for mobile, browser-based, or hardware-accelerated inference. That workflow is especially important when you want to bring YOLOv11 object detection into real products instead of keeping it only in notebooks.
- ONNX: helpful for portable inference pipelines.
- CoreML: useful for Apple-focused deployment.
- TensorRT: often used for accelerated NVIDIA workflows.
- Edge deployment: useful when latency matters most.
For lightweight deployment, you may also want to read our guide on Model Quantization and Distillation. It pairs naturally with YOLOv11 object detection because smaller, optimized models are often easier to ship on mobile and edge devices.
Common Use Cases
YOLOv11 object detection is useful anywhere a system needs to understand scenes quickly. That includes safety systems, inventory scanning, traffic monitoring, smart retail, manufacturing inspection, and robotics. Because the model runs fast, it fits well into live applications.
- Retail: count products or detect shelf gaps.
- Security: identify people, vehicles, or packages.
- Manufacturing: inspect parts and find defects.
- Traffic: detect cars, bikes, and pedestrians.
- Healthcare: assist with image-based detection tasks.
If you are combining vision with other AI modalities, our article on Multimodal Learning is another useful read. Vision models often become one part of a larger intelligent pipeline.
Best Practices for YOLOv11 Object Detection
To get good results, the model must be matched with good data and good training habits. A strong architecture helps, but training quality still matters a lot.
- Use clean labels with correct class IDs.
- Make sure bounding boxes are accurate.
- Include enough variety in the training data.
- Test the model on images from the real deployment environment.
- Start with a pretrained checkpoint before fine-tuning.
- Evaluate with validation metrics instead of guessing visually.
Another important habit is to keep the task focused. If your use case is only vehicle detection, do not train the model on many unrelated classes unless you truly need them. Smaller, cleaner problem definitions often produce better results.
Since explainability also matters, our article on Explainable AI can help when you want to interpret why the detector chose a specific box or class. That is especially useful when a system must be reviewed by humans.
Common Mistakes to Avoid
Even a strong model can give poor results if the workflow is wrong. Fortunately, most mistakes are easy to prevent once you know what to look for.
- Bad labels: inaccurate boxes create unreliable training.
- Wrong class mapping: labels and class names must match.
- Too little data: the model may not generalize well.
- Only checking training accuracy: validation matters more.
- Ignoring deployment limits: a good model can still be too heavy for the target device.
A good rule is simple: trust the pipeline, not a single prediction image. That means checking labels, metrics, sample outputs, and deployment constraints together. When those pieces line up, YOLOv11 object detection becomes much more dependable.
A Simple Summary of the Whole Pipeline
- Prepare images and YOLO-format labels.
- Choose a YOLO11 checkpoint.
- Train on a dataset such as COCO8 or your custom data.
- Validate with precision, recall, and mAP.
- Run inference on new images or video.
- Export the model for deployment.
- Optimize it for your target device if needed.
This summary captures the entire life cycle of YOLOv11 object detection. It starts with data, moves through training, and ends with deployment. In other words, the model is not just a file. It is a full workflow.
Conclusion
YOLOv11 object detection gives you a practical and modern way to detect objects in images and video. Ultralytics’ official docs show that YOLO11 was released on September 10, 2024, supports multiple vision tasks, uses named checkpoints from yolo11n.pt to yolo11x.pt, and can be trained with the standard Ultralytics Python or CLI workflow. The detection docs also define object detection clearly: find the object, draw the box, and return the class plus confidence. :contentReference[oaicite:15]{index=15}
More importantly, the model is useful because it fits real work. It is fast enough for many live systems, flexible enough for different hardware, and simple enough to train without a huge amount of custom engineering. When the data is clean and the workflow is well designed, it can become a reliable part of a production vision stack.
To continue learning, explore Model Quantization and Distillation, Multimodal Learning, and Explainable AI. Together, these topics make YOLOv11 object detection easier to deploy, explain, and extend.
Further reading: Visit the official Ultralytics YOLO11 documentation, the object detection guide, the dataset format guide, and the COCO dataset website.